Classic Portrait Painting In Oils
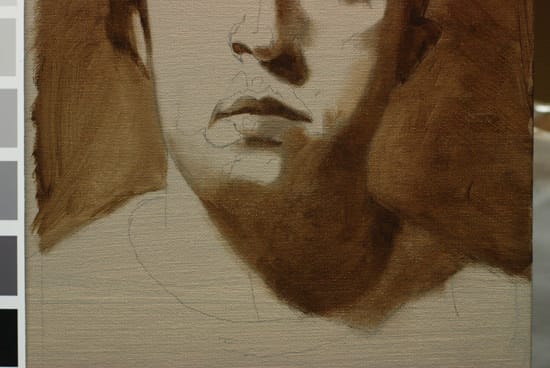
How to paint a black & white portrait in Oils
Have you been practising your portrait drawing for years yet making the jump to oil portrait painting always seems to end in an underwhelming finish?
Or do you walk around portrait galleries in awe with the question, 'How do they do that?'
Maybe you're frustrated by your process and don't know how to change it.
Portraits can seem like the toughest subject to crack and you can easily be disheartened by your efforts. One wrong brushstroke can cause a subject to suddenly look 'wrong', panic sets in – your pencils get sharpened, charcoal out and you don't come back to painting for a while.
But you don't want to draw anymore, you want to paint.
So where do you begin?
A Step-by-Step approach
Materials
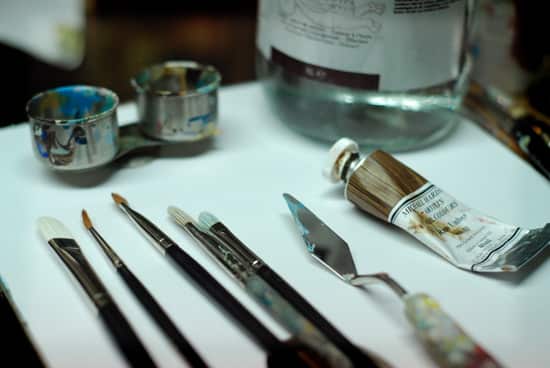
Why oil portraits?
They dry slowly, and for portraits time is essential.
Let us start at the beginning.
I'm going to keep things simple.
- 3 easy techniques to learn.
- 3 basic paints to use.
Oil paint – for this series of demonstrations I will be using Artist quality oil paints.
- Raw umber
- Ivory black
- Flake white (or Titanium White)
Oil paints are made by mixing ground pigment (the colour) with a drying oil. Most artist quality paints are mixed with cold pressed linseed oil. Whites often are mixed with a different oil, walnut or poppy oil, as they are less yellowing than the linseed oil.
I'm using Artist quality paints which have a higher pigment quality than student grade paints, you can read about the differences (see the 8 key differences between artist & student grade paint)
I am using a mixture of brands including Michael Harding, Old Holland & Winsor and Newton.
Support – ( what you paint onto)
A 5 or 6mm thick piece of MDF can be a great starting point. Prepare the surface with an acrylic gesso, sanding in-between coats, see here how to apply gesso.
Pro tip: Make sure to give all sides of the MDF board a coat of size, especially the edges which can be very absorbent to moisture.
Many portrait artists prefer to work on linen rather than cotton as you can get a finer weave but for this demonstration, I am using a pre-primed canvas. The actual canvas is a Belle Arti Cotton Canvas.
Brushes – For this demonstration I'll be using:
- Rosemary & co Ivory Filbert– size 4, 2 & 10 (size 6 & 8 are also very handy to have)
- Rosemary & co Kolinsky Sable series 33 Round – size 3
- Rosemary & co Kolinsky Sable series 66 Filbert – size 8
To learn more about brushes see a quick way to understand brushes
Coloured ground
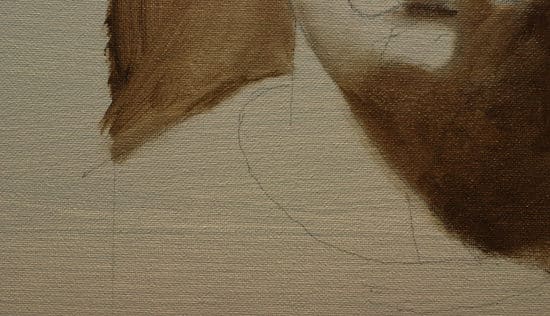
Oil paints increase in transparency with age, even thick opaque colours. To test for yourself, make a few pencil or pen marks on a piece of scrap canvas or board, paint over them opaquely and then take a photograph to see the coverage, check back the next day and then the next week to see if the opacity has changed.
For a tonal study, a coloured ground is a must, it helps you to establish the extremes of the painting, the darkest darks, and the lightest lights. It also makes it easier for you to judge tones and is a lot more forgiving than a white canvas.
Pro tip: you can, of course, experiment with a pure white ground for creating an underlying glow to the skin. The Pre-Raphalite painters were fond of this method. Traditionally, the white ground has been used to illuminate the transparent layers of oil colour.
Acrylic or oil for the ground?
I have used acrylics in this example. It is a mixture of raw umber and titanium white, notice how it has been applied quite thinly, with some of the white gesso showing through. This is for 2 reasons:
- I don't want to lose the 'tooth' of the canvas. The tooth is the grain, and texture of the canvas and helps to pull the paint off the brush. If you paint on a smooth prepared board you will notice the difference with the paint feeling like it is 'sitting on top' on the surface.
- You don't want to create a seal with thick acrylic, you still need the oil to be able to adhere to the surface underneath, so always add water to your acrylic mixture.
You could also use quick drying oil paints which are sometimes called Alkyds.
Or establish a tone just with raw umber and turpentine (or odourless mineral spirits) or standard raw umber and quick drying white.
White pigments dry more slowly than the raw umber which is an earth colour and dries fairly quickly (which is why I recommend a quick drying white above).
If you have an underpainting that has too much oil in it, you will be breaking the number 1 rule of oil painting – fat over lean
What is fat over lean?
A new Paleo diet plan?
No, fat over lean is the expression painters use to make sure you prevent your oil painting from cracking.
It basically means that each succeeding layer of paint should have more 'fat – oil' than the preceding layer.
It's all to do with how oil paints dry.
- Turpentine or odourless mineral spirit (OMS) dries by evaporation.
- Oil dries by oxidation – it absorbs oxygen
For this first stage, we will be using OMS or Turpentine mixed with the oil paint so it has a 'lean' underpainting which will dry quickly.
When we get the next stages of the portrait painting we will be mixing linseed oil with our oil paint and these layers will be more oil-rich, hence 'fatter' and will take longer to dry.
Palette layout and tone
For this first 'blocking in' of the painting, we will be painting with raw umber only.
For further paintings and for a darker finish, a mix between raw umber and ivory black will be used, however, a great deal can be learned by just using raw umber and white.
The choice of palette colour can be a deciding factor in your success.
The image below shows the different optical effects that happen to the colours depending on the colour or tone of the palette they are placed on. If you were working on a very dark painting – a black palette would be very useful as beginners have the tendency to never go dark enough when they first start painting.
And when you see the raw umber on the white palette you can soon see why – the raw umber looks black.

For this painting tutorial, I will be using the mid-tone option. A sheet of perspex (3mm thick) that I have just laid on top of the coloured ground canvas (raw umber & white).
Please note: Even though there is white on my palette this is just to illustrate the differences in using a tonal palette. I don't use white at all in the first section of the painting.
Pro tip: When painting in the studio I have a larger sheet of glass that I can adjust the tones underneath depending on the subject matter. The tones could be a sheet of grey paper, a piece of black card or a section of canvas painted to a mid tone.
Reference photograph
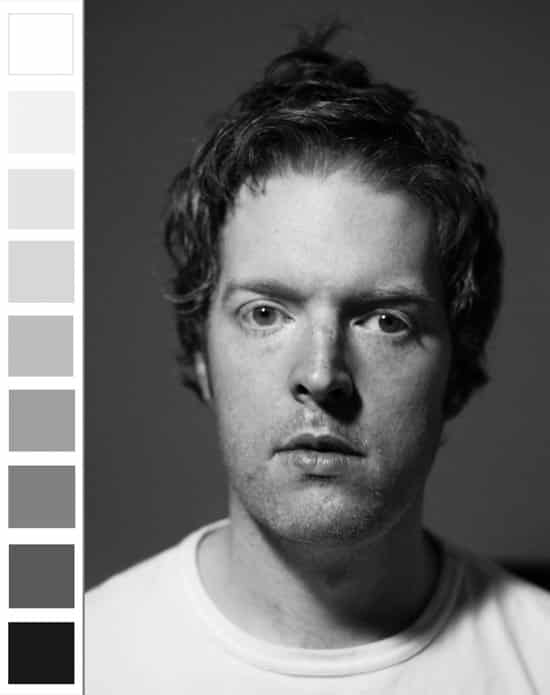
I have chosen a self-portrait, as when you're first starting you're more forgiving of any mistakes on yourself.
The key points to notice are:
- a wide tonal range from the bright white of the t-shirt to the dark black of the hair.
- a single light source so you get a strong cast shadow this can help to create the illusion of depth and interest in your painting.
- a dark background so the lights on the face will stand out
Drawing out portraits
Accurately representing the human face has been an obsession with artists for years and there is still something amazingly compelling about portraiture.
For this series, I will be concentrating more on the technical approach using Classical Painting techniques rather than using this as a series on a Portrait Drawing course.
Usually, the initial issues stem from a lack of knowledge of drawing.
If you have studied drawing, or are aware of the powerful tricks your brain can play with you when trying to record something accurately then you are at an advantage for the initial drawing out stage – however, if are more interested in learning the painting techniques then just take your time and sketch as accurately as you can.

I've drawn out the basics of the portrait painting onto the canvas with a 2B pencil and notice how I also draw in the shadow line.
The shadow line is where no direct light hits the subject, so the darkest darks. It should be a simple line drawing.
I gently rubbed over the initial pencil marks with a putty eraser just to leave the faintest of lines. The less graphite you have to mix into the paint the better. Some artists prefer to draw in charcoal, or if you are working on a very photorealist finish a permanent marker with a fine tip can be used. Try to find a brown pen rather than black, as it is more forgiving.
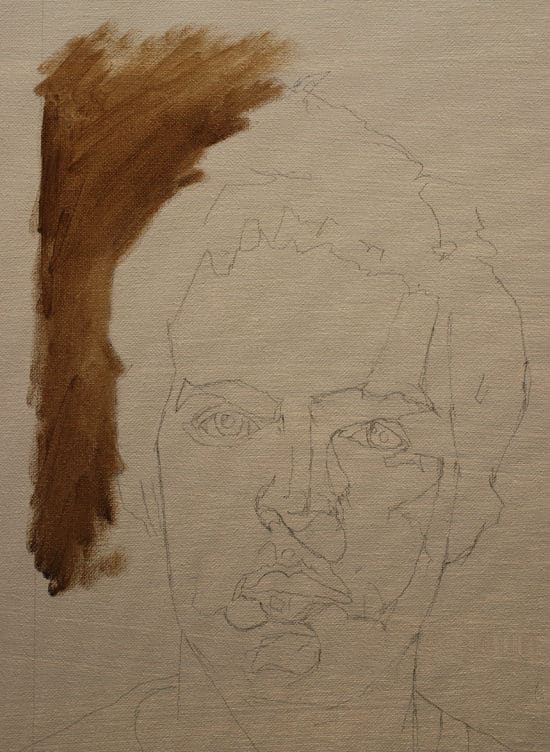
The first mix is raw umber diluted with the odourless mineral spirits – OMS. Pure gum turpentine is traditionally used and 'cuts' through the oil easier, but if you are working in a confined space with poor ventilation then odourless mineral spirits are a great option. 'Zest-it' is also nice to use and has a citrus scent.
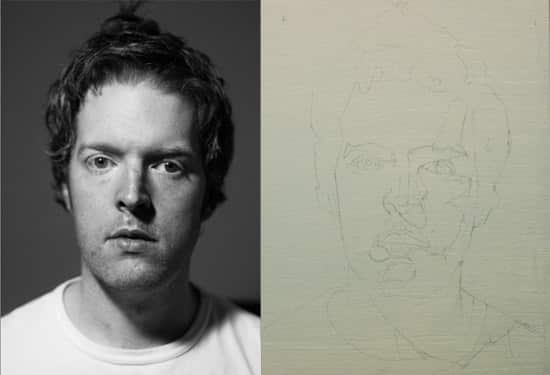
For this example, the reference photo is the same size as the painted image.
This approach and technique is associated with the sight-size method and can be very effective when you are first starting portraiture.
You don't have to set up a cast or model from life, just print out your reference image the same size as your canvas and practice working 1: 1. This way you can quickly and easily judge the tones and shapes in your painting, by flicking your eyes between the two images.
Step 1 – Block in the background

Working between a number 2 and number 4 (Filbert Ivory brush) I begin to block in the background. The paint mixture is thin, yet opaque. I dip my brush into the OMS, when I say dip, I mean 2 mm. Just a really tiny amount. I then squeeze the brush tip in some kitchen roll so the brush is damp but not wet.
I apply the paint with a scrubbing motion, working between the smaller brush for the details, then swapping to the larger brush for the larger areas.
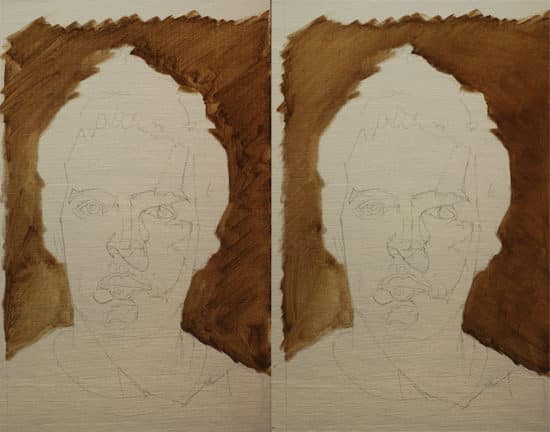
The initial 'scrub in' is quite loose, just to get a feel for the tone on the canvas. I then work over it with a larger brush to smooth out the tone. We are trying to keep the tones flat and simple so I work over any thicker areas of paint so the surface is more like a stain, rather than thick paint.
Step 2 – Block in the darkest darks
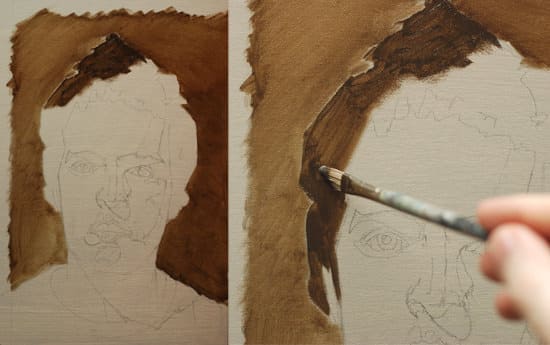
I now establish the darkest area in the painting, still just using the raw umber. As I know some of these areas are even darker than the raw umber I can feel the confidence to work with slightly thick paint. Again, not using too much of the OMS, it should feel like a dry brush effect and the more you 'scrub' the further the paint will go.
Areas, where the tones are very close, are kept as one single mass tone. The tendency will be to want to go in and add all the little subtleties and details you are beginning to see.
Like chocolate on a diet, we have to learn to resist!
Step 3 – Dry brush in the shadow line
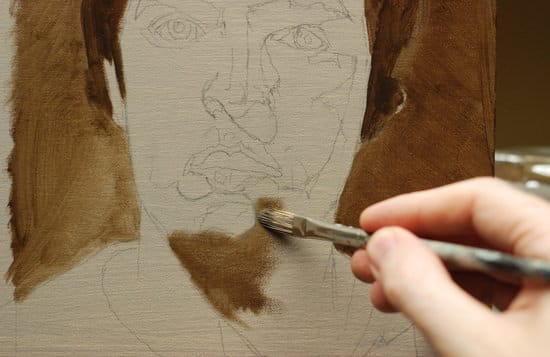
Notice how when I am applying the paint to the inner parts of the portrait I'm keeping the edges very soft. This is key when building up a portrait with this method. Hard, sharp edges are tough to cover over when you are working with thin layers of oil paint so try and keep your edges soft in these early stages.
The tendency now will be to try and grab some white and 'get painting' but again this is unwise- remember- start slow, so you can finish quickly.
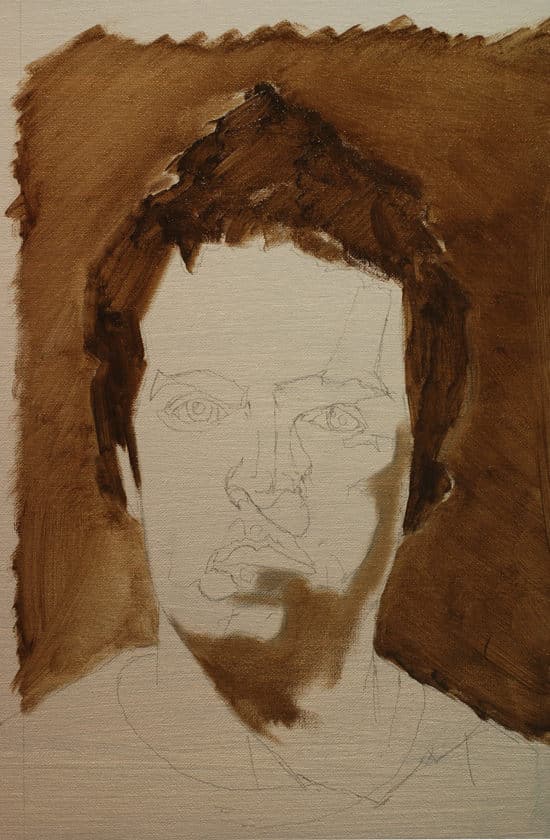
Check the drawing on your painting and check your tones are going along the right lines. You can squint your eyes at the subject which is a very effective method of simplifying tonal values.
Now have a look at the edges between the background and the edge of the head, notice how the hair and the ear are blurred. The photograph as been taken to mimic how the human eye sees, so soften the edges.
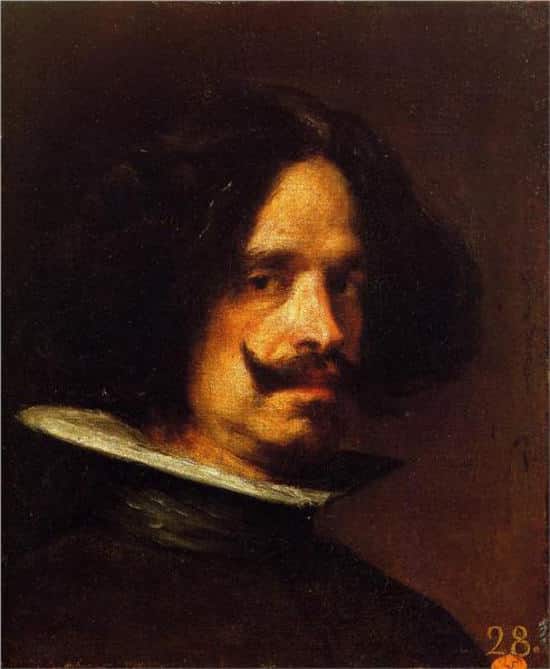
If we look at Velasquez's self-portrait notice how soft and blurred the edge of the hair next to the face is. They blend into each other so your gaze is focused on his gaze.
Step 4 – Soften the edges
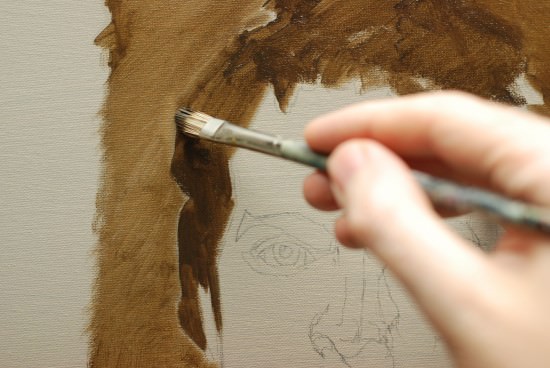
To blend an edge take a dry brush (or a brush with a very little OMS if the paint is beginning to dry and you still need to blend it) and gently brush over the line. I often use sables for this, as the softer hairs enable a smoother blend. The Ivory filberts are slightly softer than a pure hog brush so are still very useful when blending, you just need to use a lighter touch.
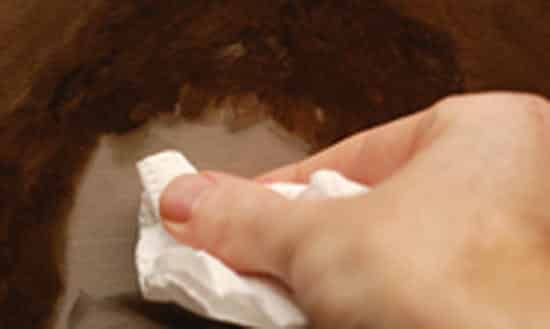
I sometimes also use a piece of kitchen roll (ideally lint free) or a cotton rag to take the edge off. And sometimes only a finger will do just to get that subtle blend (If you like the effect of using your finger for blending then make sure you apply barrier cream before you start your painting session. Be aware to wash your hands. I know I sound like your mum, but the lead used in some of the paints can be dangerous if persistently having skin contact.
Step 5 – Add more shadow detail
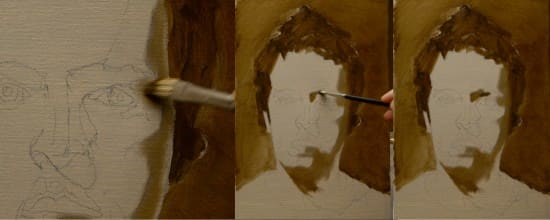
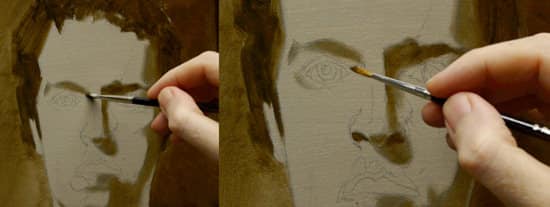
I now put some more of the shadows into the portrait using the smaller round sable, at this stage, I'm concentrating on the areas that would receive no direct light.
It is important to identify what falls into dark shadows and mid tones and it is not as easy as it sounds. Really study your reference image and say to yourself:
'If I could only paint in pure black and pure white, what would I choose ?'
Everything that falls into the black category is what we are concerned with at this stage.
So even though some areas on my cheek are dark, I don't put those in yet because they are halftones and will come as the portrait progresses.
You want to try and keep your darkest shadows one dark tone so when you come to put in the halftones you will have more scope to model the form.
I'm still keeping a flat tone and a dry brush so the effect is very soft.
Step 6 – Using a smaller brush

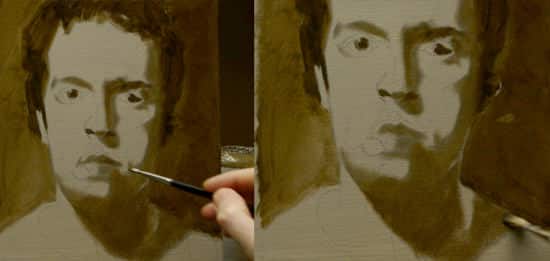
More detail, checking the drawing and adding dark to the eyes, lips and collar bone.
Step 7 – Refining shadows

I now step back from the painting and squint my eyes, I flick my eyes between the reference photo and the painting and adjust any hard edges and drawing.
Step 8 – Checking edges and having a cup of tea


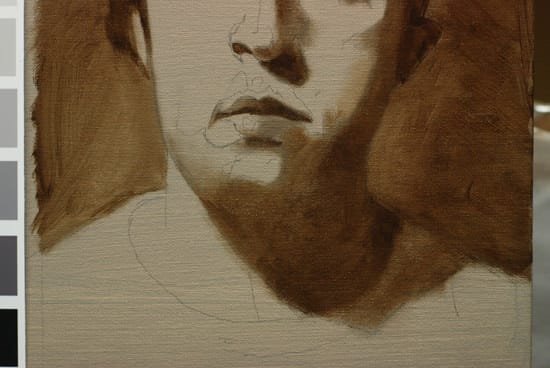
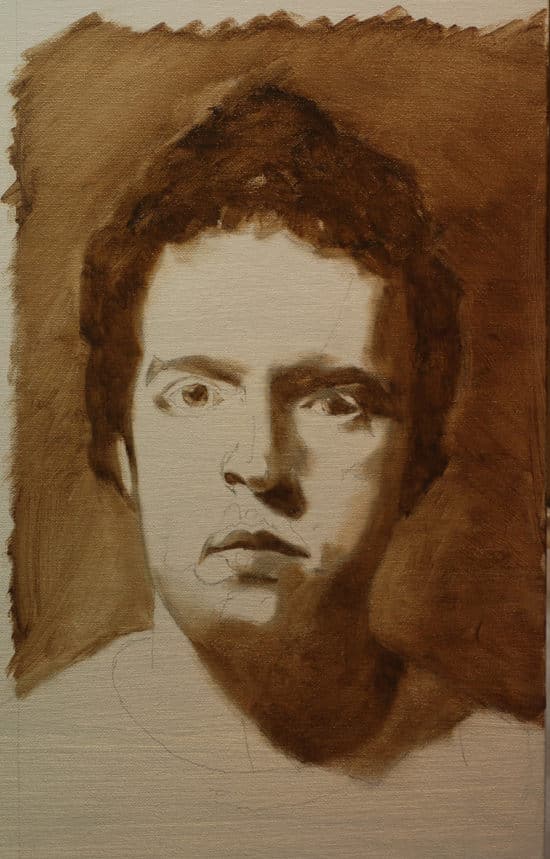
It is really important when painting oil portraits to give your eyes a break, go and have a cup of tea, come back and make your final tweaks and leave this stage to dry overnight.
Brilliant, our first stage is done.
Happy painting!
You might also like:
1. How to Paint a Portrait in Oil – Part 2
Classic Portrait Painting In Oils
Source: https://willkempartschool.com/how-to-paint-a-portrait-in-oil/
Posted by: goblerespense.blogspot.com

0 Response to "Classic Portrait Painting In Oils"
Post a Comment